


This document illustrates how Total Float and Free Float bars are displayed within the Primavera P6 Gantt Chart.
To Display a Total Float bar:
Total Float is the amount of time an activity can be delayed without delaying the end of the project. The total float
bar is already defined as one of the standard bars. To show this barin Primavera P6 , go to View, Bars, and mark the 'Float Bar'.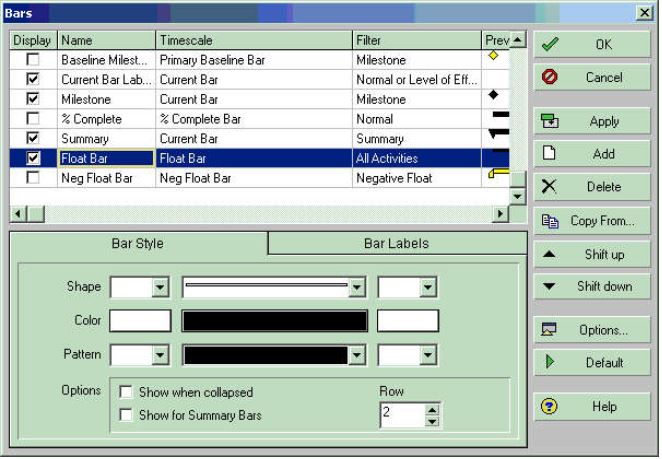
To Display a Free Float bar:
Free Float is defined as the amount to time an activity can be delayed without delaying any of it's successors. Since
this is not a predefined bar, it must be calculated by means of a Global Change. Please follow the steps below.
Note: This solution will use the following user defined fields: 'user start date 8', 'user finish date 8' and 'user
number 8'. If these fields are already in use in your project, they may be exchanged for other compatible user
fields, however, you will need to ensure that the start date field and the end date files have the same number.
1. Create and execute the following Global Change (Tools, Global Change, Add):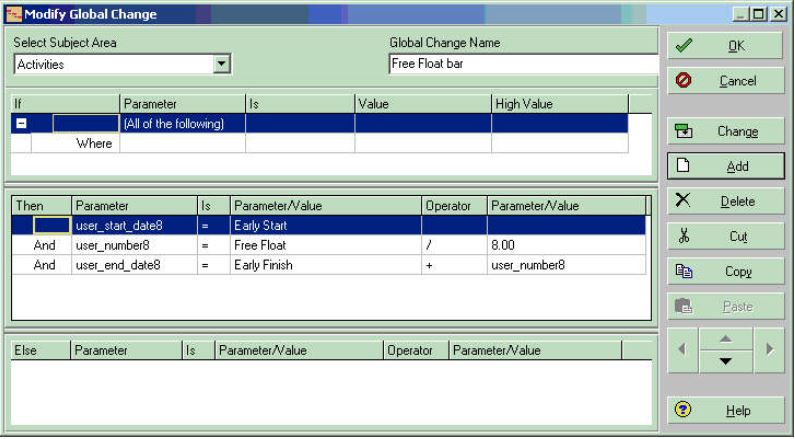
Please Note: the line 'User_number8 = Free Float / 8.00' is converting the Float from hours into Days. This
example uses 8, since the Admin Preference is set to '8 hours per day'. If you are using a different hours/day
setting in Admin Preferences, then this should be used instead.
This Global Change will populate the user field 'user start date 8' with the start date of the activity, and 'user finish
date 8' with the finish date of the activity plus the Free Float. Save this Global Change since it will need to be rerun
after each time the project is scheduled.
2. Creat a bar to span the user start and finish dates calculated in Step 1. Go to View, Bars, and add a bar, selecting
a Timescale of 'User_start date8-user_end_date8'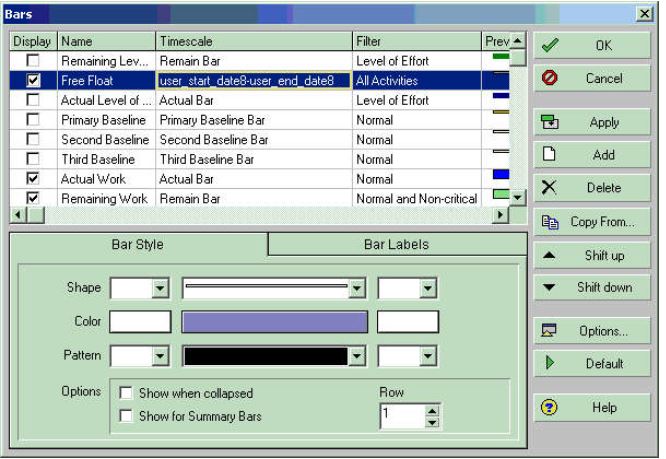
Note: If you used different user start and end dates, then choose the appropriate Timescale.
Hints and tips:
Bars are drawn on the screen in the order in which they appear in the 'View, Bars' dialogue - with the bars at
the top of the list drawn first, and the bars at the bottom of the list drawn last. You can use the 'shift up' and
'shift down' buttons to change the order of the bars.